How to Prevent Needle Breakage in a Sewing Machine
2023-04-13
No matter how much you love sewing, sometimes it’s so frustrating that you have to quit for the day. Sometimes, it feels like something goes wrong every time you start sewing, and you spend more time fixing problems with your machine than you spend sewing.
It’s exasperating to break needles left and right during your sewing project, but there are several things you can do to prevent it from happening. Needle breakage occurs for many reasons, and once you get these issues ironed out, sewing is a lot more fun.
If you’re a beginner having problems with needle breakage, you’re not alone. Even the most experienced sewists break sewing machine needles from time to time. Learn how to prevent needles from breaking and avoid this aggravating problem.
Best Practices to Prevent Needles From Breaking
Knowing how to prevent needle breakage will make sewing a smoother experience for you. If you break needles, it can lead to other problems, like jammed needles, bunched thread, skipped stitches, and more.
These problems add up to frustrating delays in your project, and they can stifle your creative flow. It is essential to be aware of the causes of needle breakage and use techniques to prevent it. By following the best practices for sewing, you’ll have fewer problems.
Correctly Threading Your Machine
The process for threading each sewing machine is slightly different. You must read your sewing machine’s manual instructions to get the correct instructions. Even skipping one guide can result in improper tension, which is a leading factor in needle breakage.
When the machine isn’t threaded correctly, the needle might not move smoothly through the fabric, and broken needles aren’t the only problems that can result. You can also have skipped stitches, bunched fabric, and tangled thread.
The top thread in your sewing machine is usually threaded through a series of small guides and a tensioner. Then, it comes down and goes through the needle. The bottom thread, which comes from the bobbin, is guided and comes up from underneath the machine.
Both of these threads have to go in the right direction. They also must go through all the hooks and guides designed for your machine. Otherwise, the tension will be off, the thread will get tangled, and the needle will break.
With a correctly threaded machine, the needle should move smoothly through the fabric without any skipped stitches or broken needles.
Using the Right Needle for the Fabric Being Sewed
Fabrics range from very lightweight lace to heavy leather; if you aren’t using the proper equipment and sewing practices, you will have problems. You can prevent most needle breakage by steering clear of these common mistakes.
Avoid Pulling or Tugging the Fabric
When you’re sewing, pulling or tugging on the fabric can cause several issues, including uneven stitches. It’s essential to guide the material through the sewing machine smoothly and gently.
Tugging or pulling on the material will create wrinkles, which can even cause the fabric to stretch or shrink. It also causes misaligned seams and looped or tangled thread, inevitably leading to needle breakage.
Your sewing machine has feed dogs to move the fabric through the needle's path. Feed dogs are bars with teeth that move in a continual forward-down-backward-up motion that grabs and feeds the material, so you don’t have to tug and pull at it.
Some lightweight fabrics require the feed dogs to be lowered to prevent damage to the material. When the feed dogs are dropped, you must hand guide the material through the machine. When sewing with lightweight fabrics, it sometimes helps to use thin tissue paper between the fabric and the feed dogs. This keeps the material from being pulled down and bunched, and it can also help stabilize fabrics like rayon, which tends to be slippery.
The next time you’re sewing, take a moment to notice if you’re pulling or tugging on your fabric. Take a more gentle approach and let the feed dogs do the work for you.
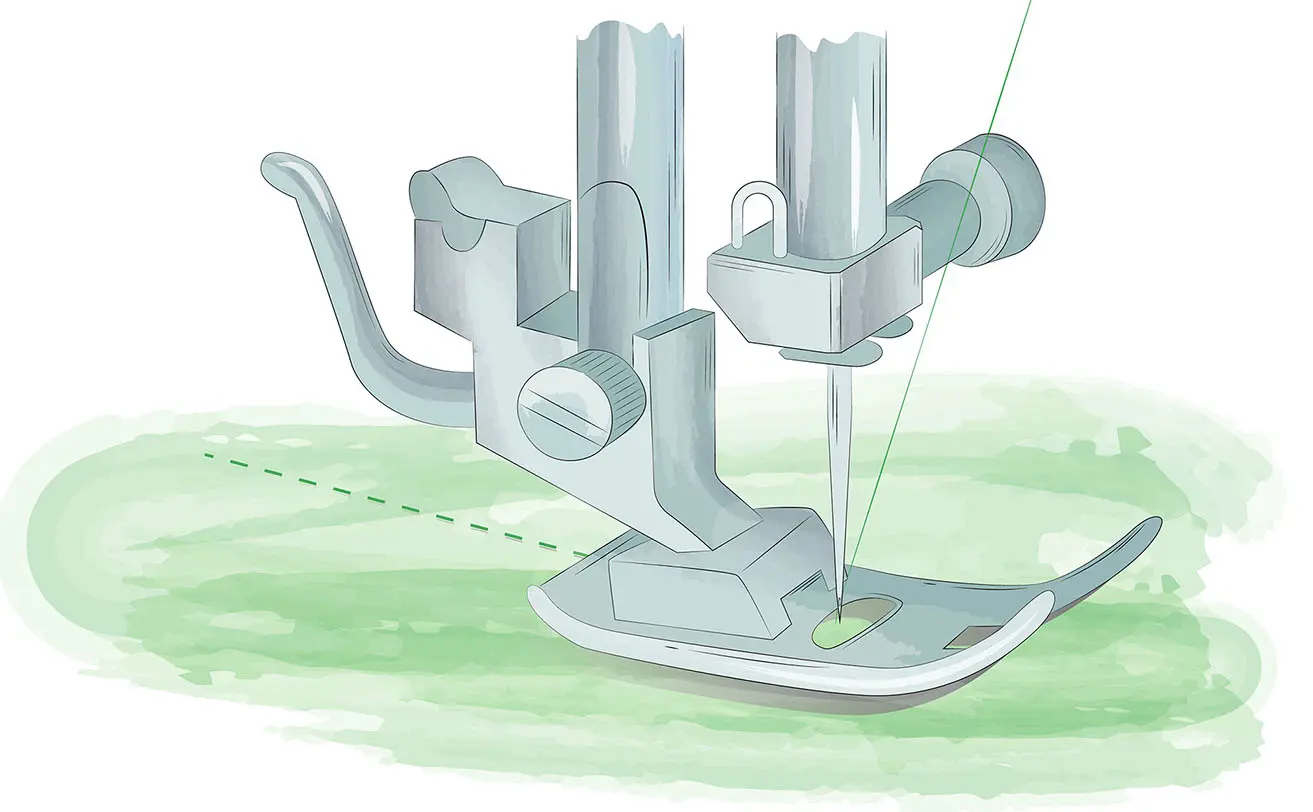
Use the Correct Presser Foot
Sewing machines come with several different presser feet. Using the correct presser foot for the type of material and project you’re working on will keep you from breaking needles.
In combination with the feed dogs, the presser foot helps guide the fabric so it is sewn evenly. The correct presser foot helps to ensure that the stitches are even, strong, and neat. The right presser foot can also help prevent the fabric from being stretched, bunched, or distorted.
With the correct pressure, the material should glide effortlessly through the machine. You might need to adjust the pressure of your presser foot. Turning the screw on the pressure foot lever clockwise increases the pressure. To decrease it, turn it counterclockwise.
Once you have adjusted the pressure, you can test it on a piece of fabric. Keep changing the pressure until you have achieved the desired results. Always read your user’s manual before adjusting the pressure foot.
Clean Your Machine Routinely

There’s a reason that your sewing machine tool kit comes with a handy little brush. Keeping your sewing machine clean is one of the most significant factors in reducing problems that lead to needle breakage.
Remove any lint, dust, and debris from the outside to clean your sewing machine. Use a brush to clean the bobbin area, case, and needle plate, then oil the machine’s moving parts. Next, use a damp cloth to wipe down all surfaces.
Clean your sewing machine after every five to ten days of use. Some fabrics cause more lint to collect underneath the bobbin and require more frequent cleaning. Some of the main culprits are flannels, terry cloth, and various types of fleece.
Again, it’s essential to consult your manual for tips on cleaning and oiling your model. Always use quality sewing machine oil on your machine.
Different Fabrics Require Different Needles
There’s a bit of a science to choosing the right needle for your fabric. It’s not complicated, but it requires you to know about different types and sizes of needles, which can initially seem overwhelming.
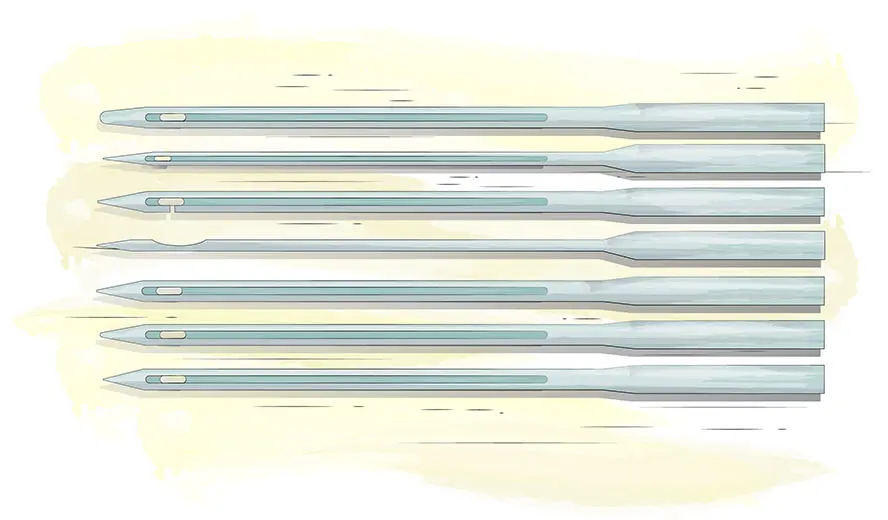
There are many types of sewing needles, but universal and ballpoint are the two most common types. Universal needles, as their name implies, are the most common. They have a sharp point that is slightly rounded, and they can pierce through multiple layers of fabric.
Ballpoint needles are designed to slide between the fabric’s weave rather than pierce through as universal needles do. When working with knits, a universal needle will cause them to bunch and snag, damaging the fabric and leading to skipped stitches and broken needles.
When choosing a sewing machine needle, the first thing is to understand the type of fabric you’re using. There are many fabric types, but generally, the lighter the fabric, the smaller needle you will need. Here is a list of common fabric weights, with examples.
Lightweight fabrics, such as crepe, silk, rayon, gauze, and tulle, are used for light blouses, flowy dresses, and skirts. Use a universal needle, size 60/8 to 75/11, on these fabrics.
Lightweight knits, such as sheer knits, Spandex, and jersey knits, are used for baby clothes, athletic wear, and light-knit shirts. Use a ballpoint needle, size 10/70 to 12/18, on these fabrics.
Medium-weight fabrics, such as cotton weave, satin, taffeta, and broadcloth, are used for dresses, shirts, blouses, and lightweight jackets. These fabrics require a 75/11 to 90/14 universal needle.
Medium to heavyweight knits, such as double knits and wool knits, are used for hoodies and sweaters. These fabrics require a 14/90 ballpoint needle.
Heavyweight fabrics, including denim, canvas, and cotton duck, are commonly used for pants, bags, and jackets. Use a 100/16 universal needle with these types of fabrics.
Extra heavyweight fabrics, like upholstery fabric, leather, and heavy denim, are used for upholstery projects and coats. These fabrics require a 110/18 size needle. You can also find leather needles for many sewing machines.
There is much more to know about choosing the right sewing needle for your project, and this is just a short summary of what you need to know about sewing machine needles. For your project, you can choose from various needle types, including quilting, sharp, stretch, denim, and twin needles.
Adjust the Tension
Your mother or grandmother probably had to adjust the tension on their sewing machine manually. If you’re a beginning sewist with a brand-new machine, it will automatically adjust the tension. Automatic tension adjustments make sewing much easier and less problematic.
There are a few telltale signs that your tension is the cause of your problems. Loose stitches point to tension problems, as do stitches that are too tight. You might also notice looping on the underside of the fabric or inconsistent stitch sizes.
Before you consider adjusting your tension, always ensure that you have addressed other issues first. On a new sewing machine, it’s much more likely that you have the wrong thread for your fabric or the wrong needle size or type. Be sure to address all of these issues first:
Insert a new needle. Needles get dull and should be changed at the start of every project or after six to ten hours of use.
Double-check that you have the same thread type on top as you do in the bobbin.
Use the correct type of thread. Generally, you should pair natural fabrics with natural threads and synthetic fabrics with synthetic threads.
Use high-quality thread because low-quality, inexpensive thread can cause problems due to breakage and fraying.
Try cleaning and oiling your sewing machine. Sometimes, that’s all it takes to solve tension problems.
The tension of the thread is critical in the operation of the machine, and at some point, you might have to adjust it manually on some sewing machines. You’ll need to access the tension adjuster knob on the machine to adjust the tension.
The tension adjuster may be located on the top, side, or back of the machine, depending on the make and model of your machine. Always refer to your user manual before adjusting your tensioner. If you cannot adjust the tension or it keeps slipping, you should take your machine to a repair shop for professional help.
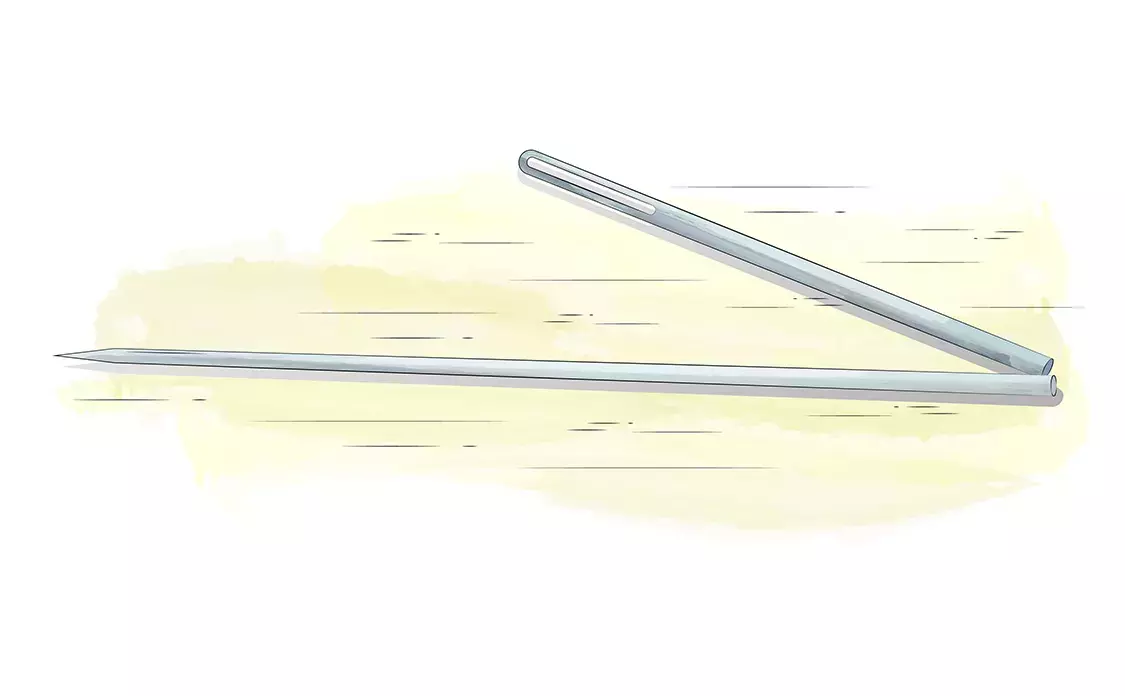
Check for Damage To Your Needle
When you’re sewing, it’s important to keep an eye on the quality and consistency of your stitches. Inspect your seams frequently, and if you notice any issues, immediately inspect your needle for damage.
Needles can become damaged over time from the friction of sewing. They can get bent or burred, preventing them from gliding smoothly through the material. Inspect them for visible signs of damage, including broken tips. Replace them immediately if you see any signs of wear.
Sewing Speed
Sewing machines are complex, and there are a lot of moving parts. These parts must move together with the right timing to produce quality results. You can disrupt the machine’s timing if you are sewing too fast or too slow.
When you sew too fast, the fabric can bunch up and cause the needle to break. Sewing fast also creates vibration, which can weaken the needle.
Use High-Quality Needles
Sewing machine needles are one of the least expensive parts of sewing compared to the cost of fabric, thread, and patterns. Using high-quality needles will mean fewer problems with needle breakage, but more importantly, you’ll have better seams with more consistent stitches. You’ll also be less likely to damage your fabric. Keep an assortment of needle types handy in your sewing toolkit.
Invest in Your Sewing Machine Materials
Needle breakage is a common issue when sewing, but it doesn't have to be. If you understand and address the causes of needle breakage and follow the best practices for sewing, you can prevent this aggravating problem.
Professional sewing is the result of investing in quality materials and equipment. Use the best equipment available and regularly clean your machine to experience better results and enjoy sewing more.


